

Now that we can spawn players, we want to have a selectable Avatar. The Avatar is the visual representation of the player.
Typically, commonly, mistakenly developers will create multiple networked player prefabs, one for each Avatar.
Then they wonder: how to make a selectable Avatar when there’s only one Player Prefab entry in NetworkManager‘s Inspector?
The solution to select player Avatar is to instantiate an Avatar object inside the universal ModularPlayer prefab.
Over time, we’ll use the same pattern for Camera, Character Controller, Collider, and so on. None of these are network objects! All of them are replaceable!
Table of Contents
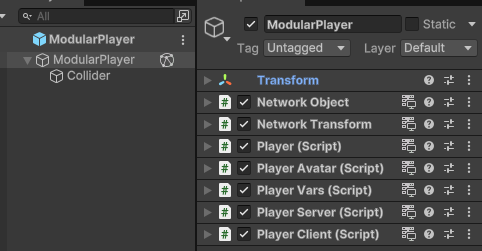
The ModularPlayer Thus Far
On purpose, there’s nothing in the ModularPlayer prefab:
Well, the player currently does have this capsule collider:
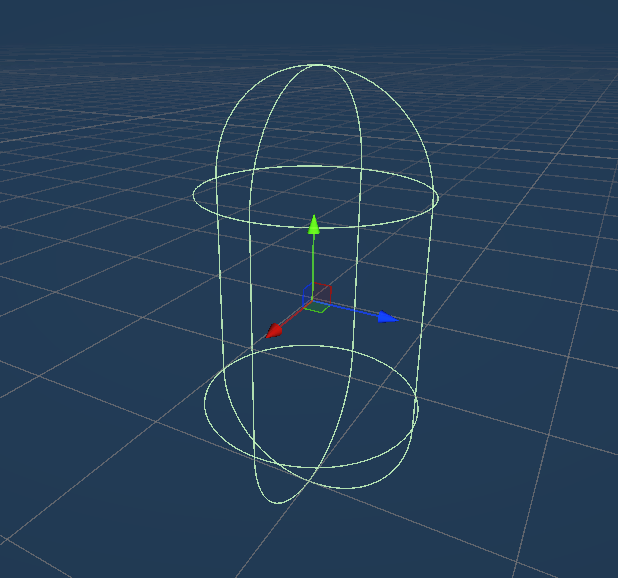
The collider may also become a customizable option. But we can go a long way assuming that all Avatar colliders are alike. In fact, for many games a uniform collider enhances fairness and predictability.
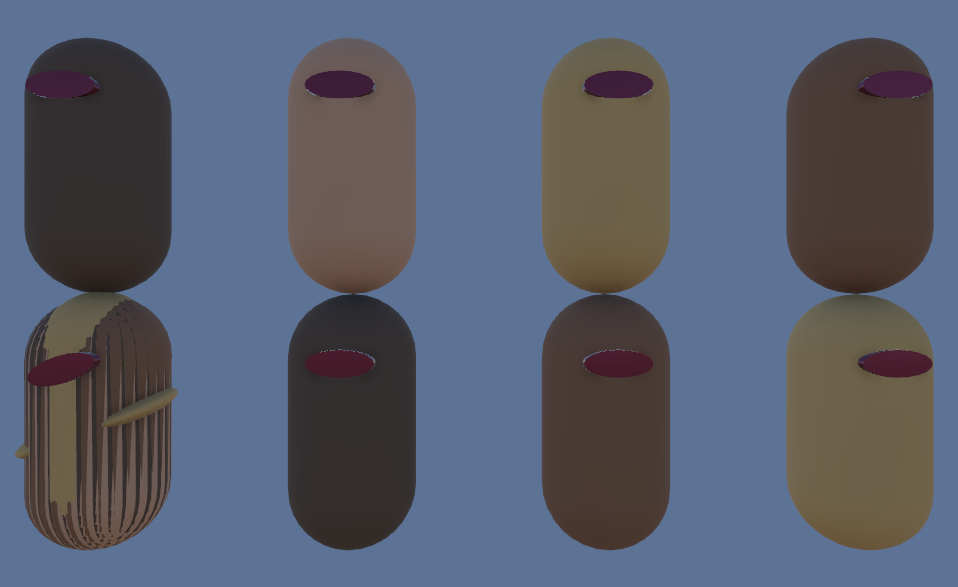
The Avatar Prefabs
I made some inclusive Avatar prefabs for demonstration purposes:
A quick look at the Project view reveals the prefabs thus far, and a bit of the AudioVisual folder structure that I extend as needed:
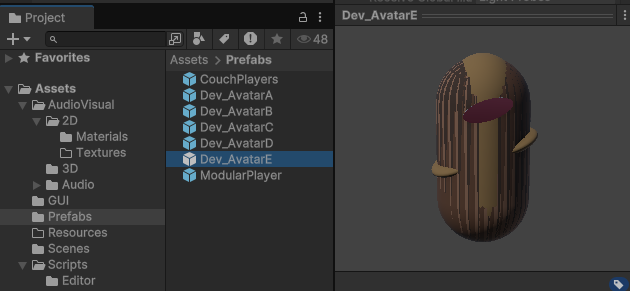
Each player has a custom skin color material. Peeking inside our visually challenged player you see it’s just a bunch of primitives:
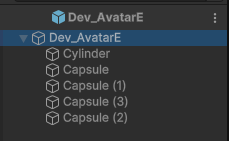
I do take care of removing all default colliders since our visual representation should be separate from collisions.
Given this setup, it should be easy to imagine this being an animated character with an Animator Controller on it.
Planned Script Interaction
Looking ahead, the visualized Avatar may need to react to player events or the networked state of the player.
For such scripting needs, an instantiated Avatar object can either call transform.parent.GetComponent<Player>() or simply GetComponentInParent<Player>() to get the Player script.
Vice versa the Player script can get the current Avatar object via the PlayerAvatar component. More on that later.
Having obtained the reference you need on either side, it’s just a matter of either polling the player’s state and/or registering for player events to drive the Avatar animations – including walk, run, idle but also fire, reload and switch weapon, and everything else really (VFX, Audio).
Fire and switch weapon? Wait, shouldn’t this be networked?
Sure, this gets routed through the Player script. Then it’s the same thing as for the Avatar itself: destroy weapon object, instantiate new weapon prefab, instantiate projectile(s) prefabs.
Generally, it’s the Player script that pushes data and tasks down to the non-networked child objects, which will do their thing completely oblivious to any networking concerns.
PlayerAvatars ScriptableObject
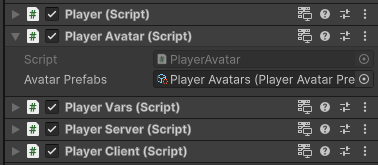
On the ModularPlayer prefab is a PlayerAvatar script that references the Player Avatars ScriptableObject:
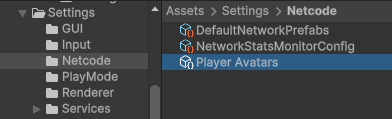
I store this ScriptableObject, and most others, under the Settings folder. In this case: Settings/Netcode.
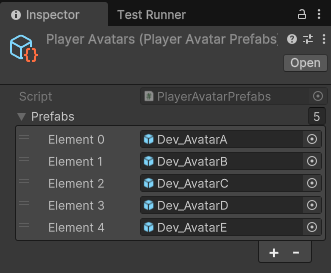
The Inspector reveals that it contains just a simple list of objects:
You can almost imagine the code, right? Well, you don’t have to:
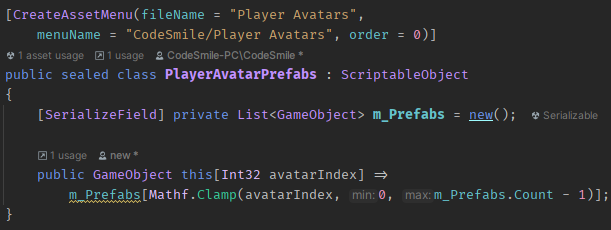
This provides PlayerAvatar with a list of Avatar prefabs. Notice how an Avatar is now uniquely identifiable by index. We’ll only ever need to send that Avatar index across the network.
PlayerAvatar Script
The PlayerAvatar script has the following tasks:
- Destroy the previous Avatar child object
- Instantiate the new Avatar child object
- In the future: customizable Avatar
As of now, it will spawn the desired Avatar by index and if necessary, destroy the previously active Avatar object.
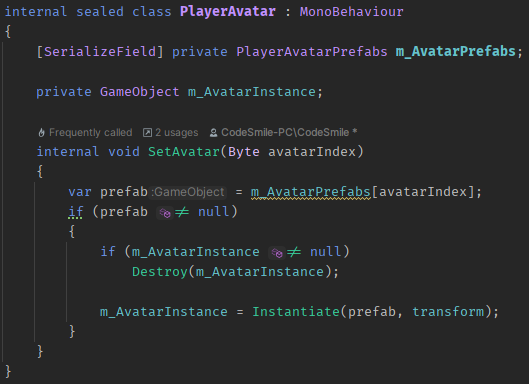
Do note that PlayerAvatar is a MonoBehaviour. It has no networked functionality.
A Byte Is Three Bytes Less
You may also wonder about the Byte avatarIndex. I assume that having more than 256 Avatars is not likely to ever occur.
For this level of configurability you’d create a customizable Avatar with separately selectable head, torso, legs, arms, shoulders, belly button jewelry and what not.
In which case you’d typically have two Avatars: male and female. And maybe races, so you’re still down to 8 races times two or more genders – all well below 256, including the body parts themselves.
Why is that important? Traffic! A byte is a byte, an int is four bytes.
Anywhere I can cut down on how much data I’m sending, I’ll do it. It’s just best practice because every extraneous byte can cost you real money for Relay, Server Hosting, Cloud Save and other services.
Spawn And Change Avatar
If you recall, spawning a player sent an avatarIndex along which gets applied in the SpawnPlayerServerRpc:
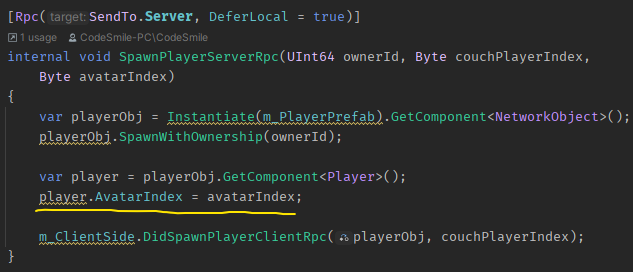
It’s just assigning the index to the Player‘s AvatarIndex property. Note how the RPC parameters are bytes, not int, to reduce the network traffic. Couch players we also only have four at most.
The same assignment is done when the test code every so often changes a player’s Avatar:

So how does this magically synchronize the AvatarIndex with all other clients?
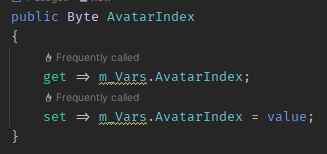
The AvatarIndex Property
In the Player script the AvatarIndex property merely forwards to the same property in the PlayerVars component:
PlayerVars contains all NetworkVariable instances and handles a couple related tasks. Namely OnValueChanged events and sending RPCs to write a NetworkVariable.
Here I use a NetworkVariable<Byte> and expose it as the AvatarIndex so that for outside code it’s merely a property:
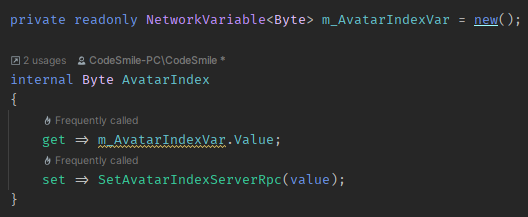
Since this NetworkVariable has the default permissions it can only be written to by the server. Hence the setter calls SetAvatarIndexServerRpc:
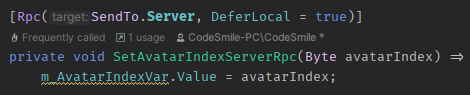
This RPC then performs the assignment. Netcode takes care of synchronizing this value change to all clients.
This way our code only ever deals with a property and needn’t concern itself whether to send an RPC or change the value directly.
Oh and if we are the Server, the SetAvatarIndexServerRpc method is just a normal method call – it’s not sent over the network!
Owner NetworkVariables
The same pattern also works if the NetworkVariable had Owner write permissions:

Then just change to SendTo.Owner in the Rpc attribute:
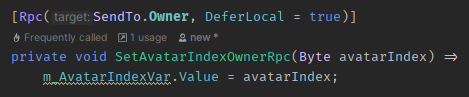
And rename the method to SetAvatarIndexOwnerRpc for consistency’s sake. Now the RPC is a direct method call for the owner object and all other participants will send a net RPC.
This makes changing permissions of a NetworkVariable really, really simple. It’s completely transparent to outside code.
Disallow Writes
Lastly, and in fact specifically in our case we don’t want to allow remote clients to change our Avatar. In that case we only need to make a check in the property setter:
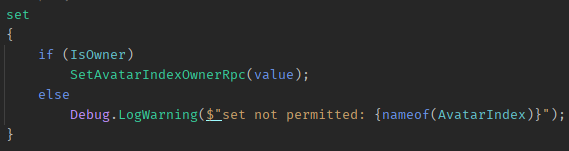
For any non-Owner who wants to set this property this just logs a warning.
Strictly speaking, we could also get rid of the Rpc in this case. And we’d have to update the server-side spawn RPC to not change the variable, instead relaying this to the client’s DidSpawn Rpc.
Applying AvatarIndex Changes
The PlayerVars script also handles the OnValueChanged event propagation.
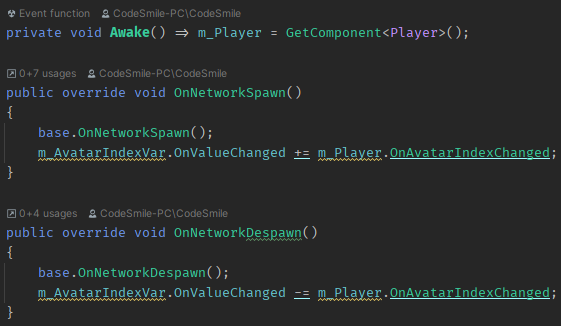
In fact it only handles the event assignment. The actual implementation is found in the Player script. This is done because the PlayerVars script may not be aware of all the references that require updating – the Player script is our go-to controller class that orchestrates such changes.
Although currently it doesn’t and needn’t do anything other than calling SetAvatar (see above) on the PlayerAvatar script:

But it’s easy enough to imagine that an Avatar change may also need to invoke an outside event, perhaps for the GUI. Or it may record and defer the change if the player is currently dead.
Summary
And that concludes the Avatar selection. It’s pretty neat and simple, and the code now only requires get/set the AvatarIndex property.
The property will magically send an RPC if we aren’t authorized to make the change, or handle permissions any other way as we see fit.
Next …
Read on with 10. Assign Input Devices …
Return to the Write Better Netcode Overview
Source Code on GitHub (GPL3 License)
Join my Patreon – it’s free! Get the latest updates by email.
Leave a comment below if you have any questions or feedback!
Leave a Reply