

Table of Contents
Netcode Project Setup with Unity 6
I find it important to manage packages and settings first before starting to work on the actual Write Better Netcode project. It’s part of setting up your work environment, and may be a tad subjective.
We will be using the latest Unity version: Unity 6000.0.10f1.
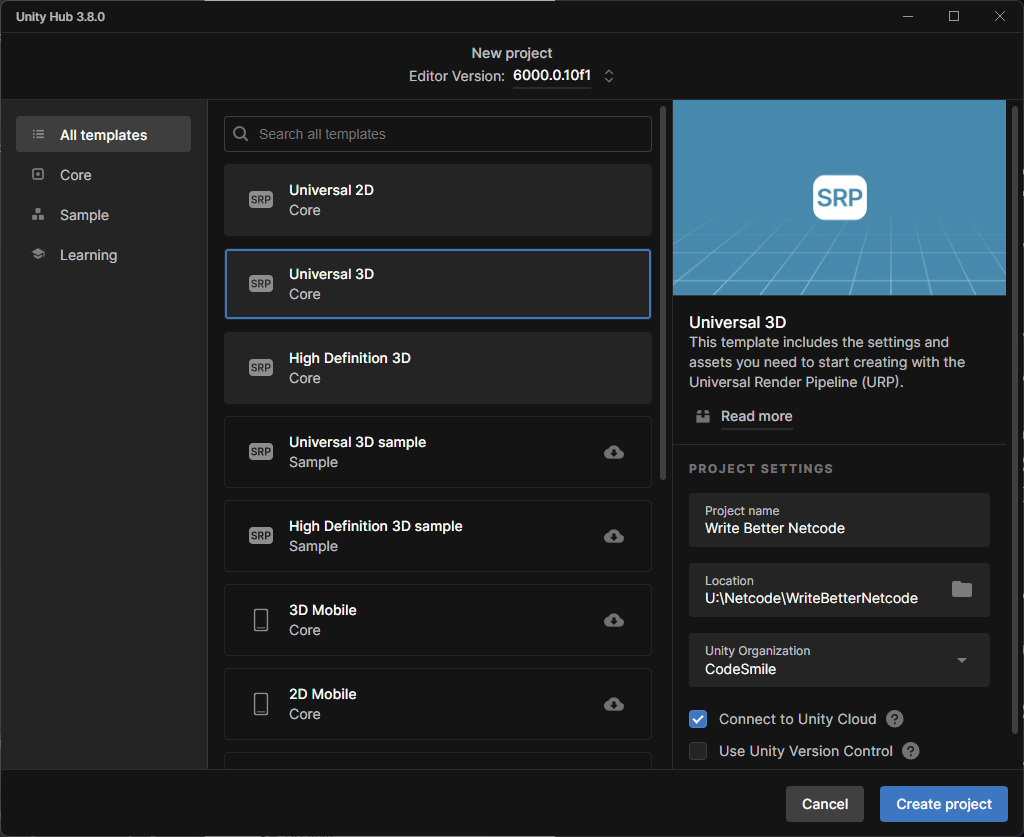
As template I chose Universal 3D (Core) which uses the Universal Render Pipeline (URP). Connect with Unity Cloud was also checked as we’re going to use Unity Gaming Services in the future.
Let’s Get Started!
What does a professional do after creating a Unity project?
Right. He sets up his work environment! 🙂
The essential configuration steps are, in this order:
- Manage Packages
- Remove / disable unwanted packages
- Add required packages
- Add optional / opportunistic packages
- Add developer packages
- Tweak Settings
- Preferences
- Project Settings
- Cleanup Assets
- Delete default assets
- Create basic folder structure
- Move settings assets
- Add Assembly Definitions
Manage Packages
I’m managing packages first because some packages also create entries under Project Settings which we’ll want to go over only once.
I also consider it good practice to go through all the packages in the Unity Registry whenever you use a new major Unity version to find new packages and take the opportunity to check them out.
Removing Unused Packages
Even though each individual package adds little overhead to the editor, they still add a little time and resource usage and may also add to build size.
So if you know you’re not going to use Visual Scripting (nobody does), by all means uninstall it.
The packages in bold are the ones I actually removed from the project, the cursive packages I would typically remove but didn’t because I know some of you may need them:
- Timeline (I rarely have use for it)
- Version Control (The project is on GitHub)
- Visual Scripting (Nobody uses this)
- Visual Studio Editor (Real devs are Riders)
Unity? Oh, ah, yeah .. I think we … ah, page fourhunndertthirtyseven please.
I thought the removable packages list would be longer — but no, with Unity 6 there are far fewer packages I find necessary to remove. Unity did listen!
Disabling Built-In Packages (Modules)
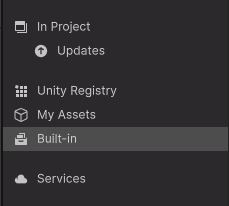
Don’t forget the Built-In packages (formerly Modules) section!
Many of them are hardly ever used, such as Wind. Others are only meaningful in projects utilizing certain technology, such as VR/XR. If you’re making a 3D game, why leave the 2D packages enabled? Disable Terrain if you’re not making an open-world game. Etc.
For this project, I left the Built-in packages in their default state because disabled Built-in packages can lead to errors when installing an asset that depends on a disabled package.
If such errors happen to me after importing an asset, the compile errors make it rather obvious – provided I remember that I had disabled that package. Usually, I do. But since I admittedly can’t remember it every time, I’d rather leave it at your discretion.
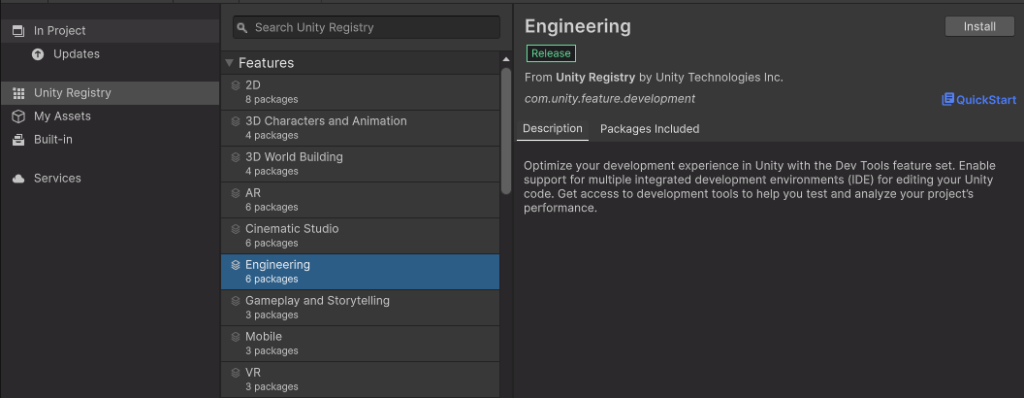
Adding Required Packages
On the Unity Registry category notice that the Features list is now completely optional in Unity 6. Again, Unity did listen!
Here’s the list of packages we need to add to the project, along with the current version:
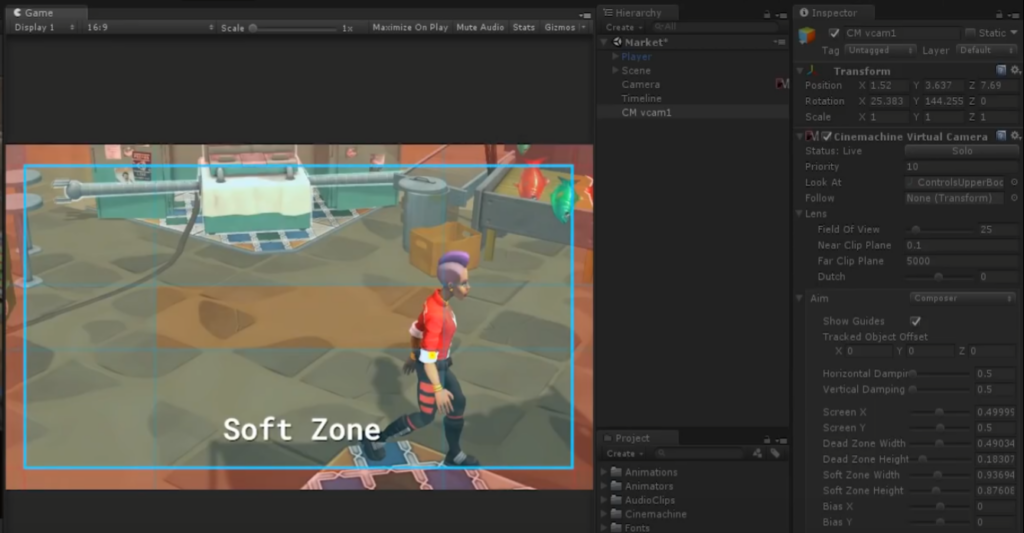
- Cinemachine 3.1.1
- Dedicated Server 1.2.1
- Lobby 1.2.2
- Multiplayer Play Mode 1.2.1
- Multiplayer Tools 2.1.0
- Netcode for GameObjects 2.0.0
- Relay 1.0.5
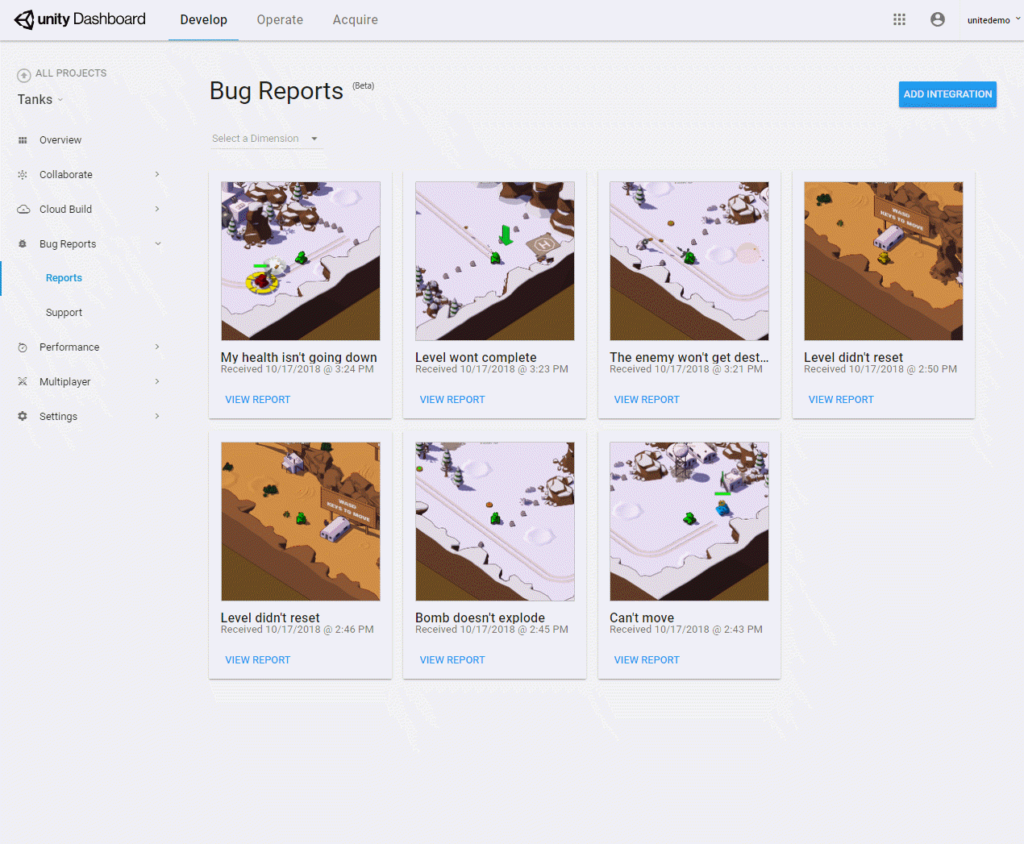
- User Reporting 2.0.11
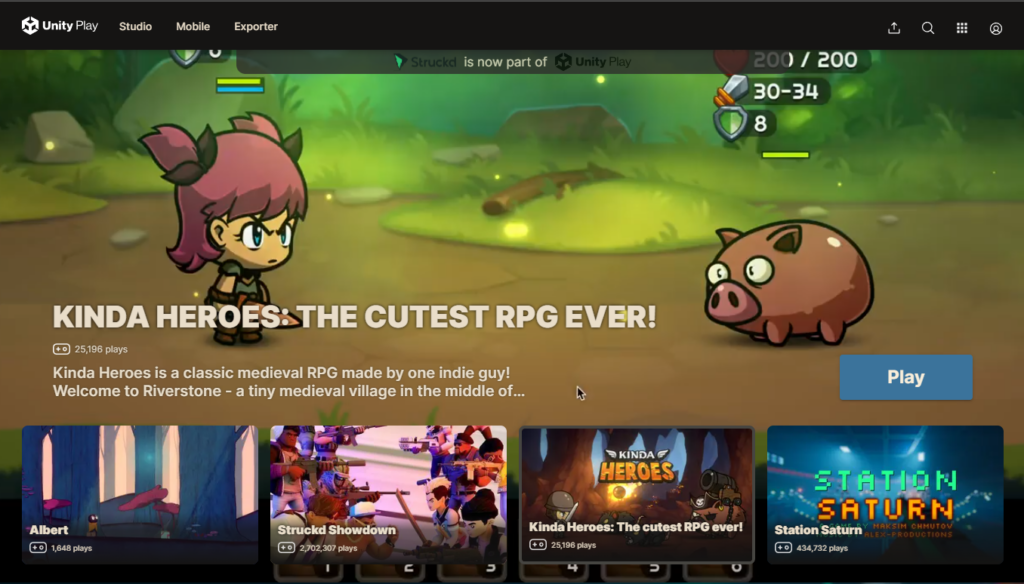
- WebGL Publisher 4.2.3
Note that you can multi-select packages to install many at once!
The package versions will change over time. There’s no point in version-locking packages or the editor until you are far into production.
In fact, I strongly prefer to keep upgrading every minor version release for every package I’m actively working with. Typically this exposes either zero issues, or one that jumps out and is easy to fix.
Highlighted Packages
We’ll use Cinemachine to set up the first, third person and top-down views. It helps mask the first person viewmodel (weapon and hands) without having to set up an awful lot of layers.
The User Reporting package is to provide a form for users to enter feedback or report bugs back to the developer. I want to test how well this works, I intend to gather feedback from the public demo.
The WebGL Publisher let’s us deploy the game to the Unity Play website for testing and for me to provide a public demo.
All the other packages are essential for our Multiplayer work. The Unity Transport package is automatically installed as a dependency.
Adding CodeSmile Packages
I have a bunch of packages in my GitHub repository. These are meticulously developed reusable extensions and features that deserve a place in any of my projects.
Specifically, I’ll be adding these packages as subtrees to the GitHub project, so that when you download or clone the project repository these packages will be included automatically.
Over time I may be adding more of my own packages as I see fit.
Adding Optional Packages
Normally, I install optional packages only when I need them. But sometimes I put them right in the project to remind myself to try out a certain package.
Here I take the opportunity to highlight some lesser known but highly valuable packages, but these may not actually be in the WriteBetterNetcode project:
- Addressables
- Create asset bundles you can (un)load separately to reduce initial download size and memory usage. Required by Localization. Used by Cloud Content Delivery.
- Editor Coroutines
- For some editor scripts it’s helpful to be able to run coroutines. It’s so lightweight that I always include it. Use:
EditorCoroutineUtility.StartCoroutine(theRoutine);
- For some editor scripts it’s helpful to be able to run coroutines. It’s so lightweight that I always include it. Use:
- Localization
- Any game needs localization one way or another. We may be using this package eventually.
- Memory Profiler
- This can be helpful to analyze memory usage and compare differences of memory usage between builds.
- Recorder
- Great little utility to quickly record videos (or screenshot sequences) of the editor or the Game view. Avoids the hassle of configuring external recording tools to only capture a specific Unity Editor sub-window.

- Serialization
- If you ever need binary serialization, or custom Json, this is the package to use! Prefer this over StreamWriter and definitely over BinaryFormatter! Curiously not listed in the Registry even though v3.1 is not flagged as exp/pre.
Manage Settings
Why go through boring Settings now?
If you were to change settings at a later time, you’d possibly have to make costly tweaks to the code, re-tweak the gameplay, or spend time debugging why the build broke.
As much as possible, settings should be all set right away. Some of these will be very important for an optimal workflow!
Preferences
Preferences are system-wide settings for the Unity Editor. You only need to apply them once in any project and they’ll be the same in all other projects.
To be able to figure out which Preferences to set, I first had to reset my Preferences. On Windows, you can delete the Unity Editor Preferences by deleting this key in the Registry Editor:
HKEY_CURRENT_USER\Software\Unity Technologies\Unity Editor 5.x
General
- Script Changes While Playing => Recompile After Finished Playing
- Since recompile during playmode never really works anyway, particularly for networked games, I prefer to avoid losing the playmode state when touching a script.
- Code Optimization On Startup => Debug
- Otherwise the debugger can’t be attached. Unity will ask us the first time we try to attach the debugger anyway, but then we’d have to wait for the editor to restart.
- Busy Progress Delay => 1s
- I want to quickly see when I’m blocked. Subjective.
Asset Pipeline
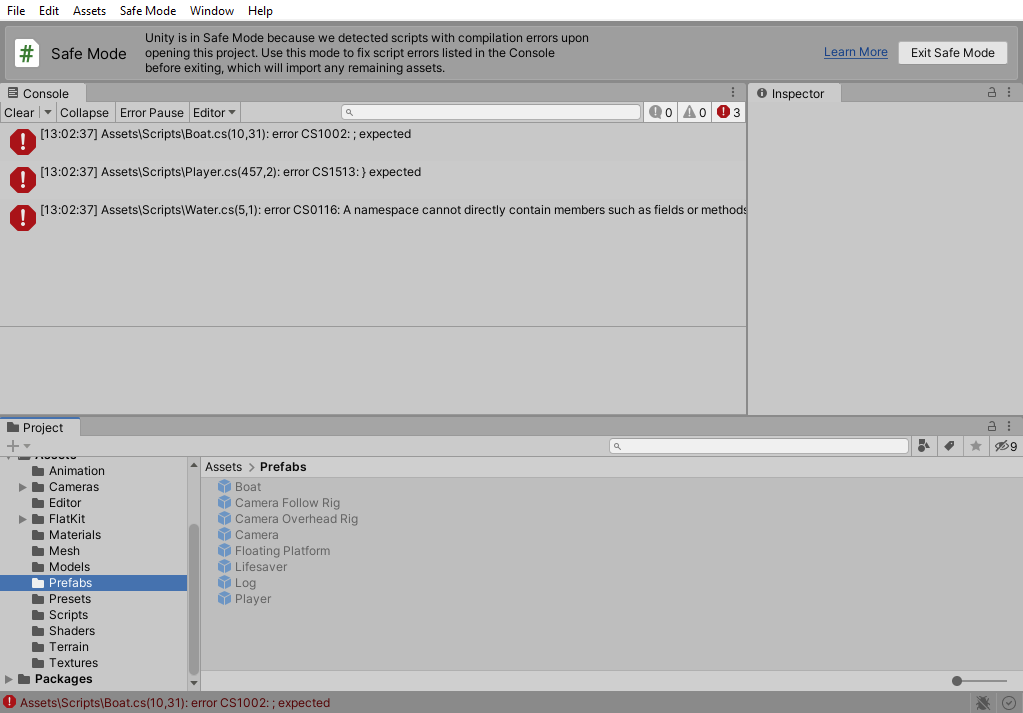
- Show Enter Safe Mode Dialog => unchecked
- The safe mode when opening a project with compile errors is mainly intended for non-technical folks.
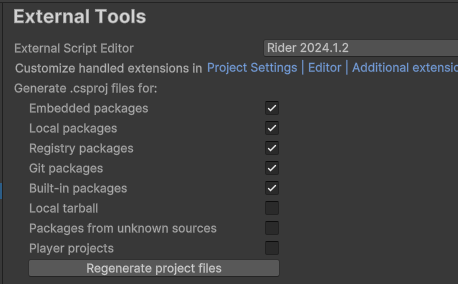
External Tools
- Generate .csproj files for: => Embedded, Local, Registry, Git, Built-in packages (or: check all)
- Get full intellisense information in the IDE for all packages, and allows navigating to package code.
Multiplayer Play Mode
- Mute Players => checked
- Don’t want to hear every virtual player’s music and jingles playing simultaneously? Neither do I! 🫨
That’s all for Preferences.
Project Settings
Project Settings only take effect for the current project.
Navigating the project settings causes some settings assets to be written to disk initially. Touching those helps with source control, since a single settings change at a later point won’t create a diff that looks like you’ve changed every setting and the tech lead is like🤨.
Some settings also require you to manually create a settings asset in the first place. Now is a good time to do so because then we can sort those assets in place when creating the folder structure.
Here’s the settings I changed for this project:
Editor Settings
- Asset Pipeline / Parallel Import => checked
- Caution: custom importers may not be compatible with parallel imports respectively need to be written with parallel processing in mind!
- Enter Play Mode Settings / When entering Play Mode => Do not reload Domain or Scene
- This is a major timesaver! Enter play mode before and after making the change: from 4+ seconds to instantaneous! This requires applying care to static variables but you’ll find them surprisingly absent in my project anyway.

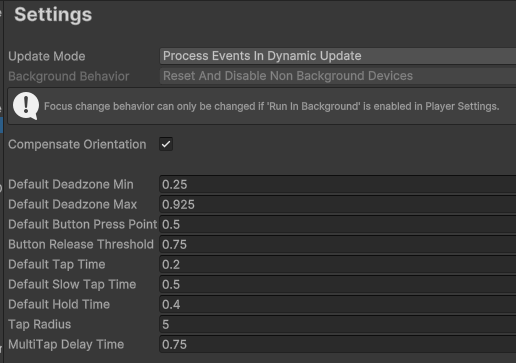
Input System Package Settings
- Settings / Create settings asset => click the button
- Without creating the InputSettings asset you can’t edit Input settings, and I guarantee that you will have to at some point.
- Default Deadzone Min => 0.25
- My gamepads are pretty worn down. I prefer to double the Deadzone Min or else my view will continuously pan around slowly. I also hate developers who don’t offer Deadzone settings in their game.🤬
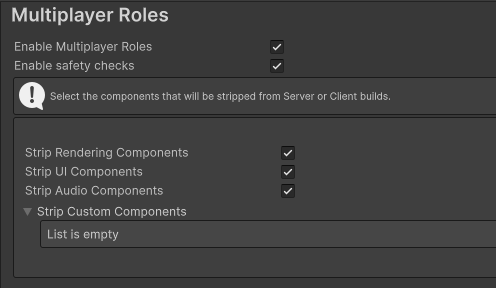
Multiplayer/Multiplayer Roles Settings
- Strip Rendering Components => checked
- Strip UI Components => checked
- Strip Audio Components => checked
- We’ll strip as much as we can from the dedicated server builds. And we enable that right away to find any dependency issues as early as possible.
Don’t forget to click Apply before leaving this page!
Multiplayer/Playmode Settings
- Player Tags => Add three separate tags named:
- Server
- Host
- Client
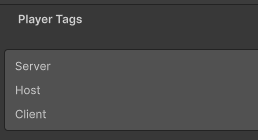
Player tags will be used to launch virtual players in their assigned roles.
Player Settings
Note that these settings exist as separate duplicates for each target platform. But with the exception of Managed Stripping Level any settings changes are actually applied to all target platforms (Windows,Mac,Linux; Dedicated Server; WebGL).
- Splash Image/Show Splash Screen => unchecked
- Launch the game faster by skipping the Unity logo.
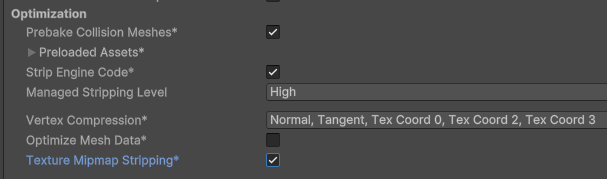
- Other Settings/Optimization/Prebake Collision Meshes => checked
- Creating mesh colliders during build is a lot faster than at runtime. Specifically WebGL takes a serious hit every time you instantiate an object with a MeshCollider component.
- Other Settings/Optimization/Managed Stripping Level => High
- Reduces the final build size by removing unused code. Typically only causes issues with Reflection code, which we shouldn’t be using at runtime anyway.
- Caution: this setting has to be set individually for every target platform!
- Other Settings/Optimization/Texture Mipmap Stripping => checked
- For platforms where quality settings restrict the mipmap level, Unity will remove the unused mipmaps from the build and thus reducing build size.
Quality Settings
- PC/Rendering/VSync Count => Every V Blank
- VSync enabled prevents screen tearing in builds.
- Notes:
- Game view has a separate and independent Vsync setting.
- Vsync can be force disabled by users via graphics drivers.
- VSync has no effect on mobile where it is always enabled.
That’s it for Project Settings!
Cleanup Assets
The last step during project setup is to clean up the Project view.
Primarily I want to:
- Delete default assets
- Create a folder structure
- Move settings assets
- Add Assembly Definitions
Delete Default Assets
Primarily this is the README asset and the related TutorialInfo folder and its contents. Depending on the chosen template you may even have more default assets, and you may chose to keep them.
I prefer to work with a squeaky clean project and get in the habit of removing unnecessary content right away.
Create A Folder Structure
Well, you add the usual folders as you see fit.
I very strongly dislike having any assets in the root (/Assets) of the project so I will organize all root files into subfolders.
You could create a complete albeit largely empty folder structure at this point, but I’m not a fan of having empty asset folders for everything ‘just in case’.
I’ve seen projects where most of these ended up unused for all eternity, or forced users to separate assets by type where it would have made more sense to keep contextually related assets together.
Learn more about organizing assets in Unity’s How-To article.
Move Settings Assets
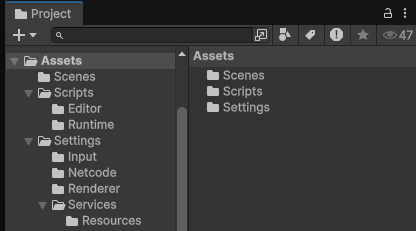
Since a number of initially created assets fall under a Settings category, be it Project Settings or Game Configuration, I create a Settings folder with subfolders for their respective settings assets.
This is what the initial Settings folder structure looks like, and I guess you can imagine which kinds of “settings” are in these folders. If the setting has to be in a Resources folder, I move the entire Resources folder:
- Settings
- Input
- Netcode
- Renderer
- Services
- Resources
We’ll surely be adding more settings over time!
Add Assembly Definitions
Finally, we need a Scripts folder. As is customary for packages, I follow the same pattern of dividing Scripts into Editor and Runtime folders:
- Scripts
- Editor
- Runtime
For now, the Editor and Runtime folders only contain an Assembly Definition each, with the Editor assembly set to be editor-only and referencing the Runtime assembly as a dependency.
Wrapping Up
With all this gruntwork done, we can now start with the actual production of the Netcode project and its content. I hope the setup article wasn’t too distracting, or boring.
I feel if I’m not starting a project clean and well-organized, I (and many others too) have a tendency to continue the remaining work in the same manner: Somewhat lax, less organized, slowly but surely evolving into an unmanagable mess.
Some of the settings even have a huge impact on how we work with the editor and how we write the code and what kind of issues we may run into – all good reasons to make those adjustments from the get-go to avoid nasty surprises.
Get the current project state via the project-setup-complete tag.
Next …
Continue reading 3. Scene Flow
Return to the Write Better Netcode Overview
Source Code on GitHub (GPL3 License)
Join my Patreon – it’s free! Get the latest updates by email.
Leave a comment below if you have any questions or feedback!
Leave a Reply